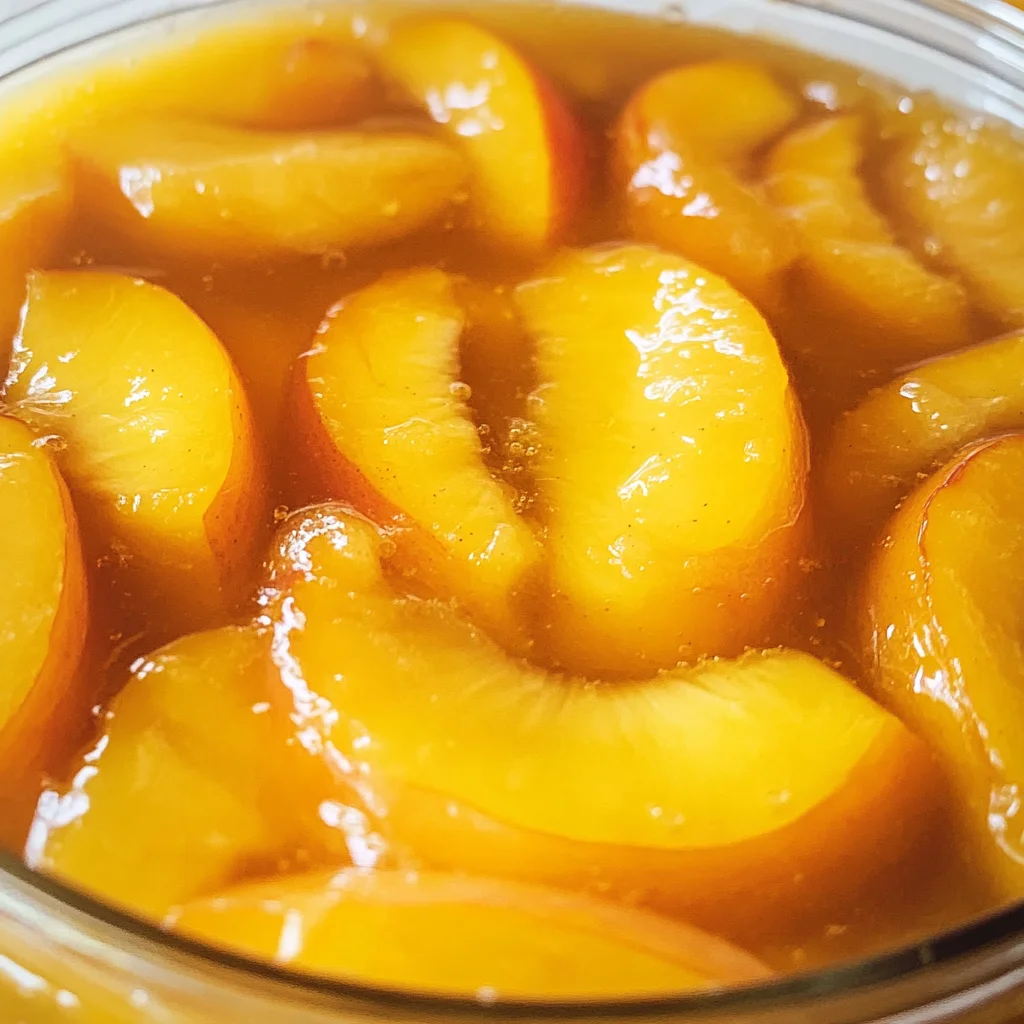
This Homemade Canned Peach Pie Filling is a delightful way to preserve the sweet flavors of summer peaches, making it perfect for pies, crisps, or cobblers throughout the year. With its silky texture and just the right amount of spice, this filling will elevate your desserts for any occasion—be it a holiday gathering or a cozy family dinner.
Jump to:
- Why You’ll Love This Recipe
- Tools and Preparation
- Essential Tools and Equipment
- Importance of Each Tool
- Ingredients
- How to Make Homemade Canned Peach Pie Filling
- Step 1: Prepare Jars
- Step 2: Prepare Peaches
- Step 3: Blanch Slices
- Step 4: Make Filling Base
- Step 5: Add Lemon Juice and Spices
- Step 6: Add Peaches
- Step 7: Fill Jars
- Step 8: Process Jars
- Step 9: Cool and Store
- How to Serve Homemade Canned Peach Pie Filling
- Classic Peach Pie
- Peach Crisp
- Peach Cobbler
- Peach Sundae
- Pancake Topping
- Yogurt Parfait
- How to Perfect Homemade Canned Peach Pie Filling
- Best Side Dishes for Homemade Canned Peach Pie Filling
- Common Mistakes to Avoid
- Storage & Reheating Instructions
- Refrigerator Storage
- Freezing Homemade Canned Peach Pie Filling
- Reheating Homemade Canned Peach Pie Filling
- Frequently Asked Questions
- How long does Homemade Canned Peach Pie Filling last?
- Can I use frozen peaches for this recipe?
- What if my filling is too thick?
- How do I adjust for high altitudes when canning?
- Can I customize my peach pie filling?
- Final Thoughts
- 📖 Recipe Card
Why You’ll Love This Recipe
- Easy to Make: With straightforward steps and simple ingredients, this recipe is perfect for both novices and experienced canners.
- Flavorful Preservation: Enjoy the taste of fresh peaches all year long, capturing that sweet summer essence in every jar.
- Versatile Usage: Ideal not only for peach pies but also as a topping for ice cream, pancakes, or yogurt.
- Customizable Spices: Adjust the spices to your liking; add more cinnamon or nutmeg for an extra kick!
- Long Shelf Life: Properly canned, this filling can last up to a year—great for stocking up!
Tools and Preparation
Before starting your canning adventure, gather the necessary tools to ensure a smooth process. Having the right equipment makes all the difference in achieving delicious results.
Essential Tools and Equipment
- Canning jars (quart-size)
- Large pot
- Water bath canner
- Ladle
- Jar lifter
- Canning funnel
Importance of Each Tool
- Canning jars: Ensure your jars are sterilized and warm to keep your filling safe during processing.
- Water bath canner: Essential for processing jars at high temperatures to eliminate harmful bacteria.
- Ladle: Helps you fill jars without spilling, maintaining cleanliness and safety.
Ingredients
This homemade canned peach pie filling is a sweet, spiced preserve made with fresh peaches and a thick, silky base—perfect for baking pies, crisps, or cobblers year-round. With this easy water bath canning method, you can enjoy the flavor of summer peaches even in winter.
Ingredients (for 4–5 quarts)
* 6 quarts fresh peaches, peeled, pitted, and sliced (about 24–30 medium peaches)
* 7 cups granulated sugar
* 2 cups cold water
* 1¾ cups clear jel (cook-type, not instant)
* 5¼ cups peach juice or water (from peaches or bottled)
* ½ cup bottled lemon juice
* 1½ teaspoons ground cinnamon (optional)
* ½ teaspoon ground nutmeg (optional)
How to Make Homemade Canned Peach Pie Filling
Step 1: Prepare Jars
Wash and sterilize 4–5 quart-size canning jars. Keep them warm until you’re ready to fill them with your delicious peach pie filling.
Step 2: Prepare Peaches
Blanch the fresh peach slices in boiling water for about 30–60 seconds. Then transfer them into an ice bath. Peel, pit, and slice the peaches. To prevent browning during preparation, soak the slices in water mixed with lemon juice or ascorbic acid.
Step 3: Blanch Slices
Boil the sliced peaches in batches for around 1 minute. After boiling, drain them well and keep warm until you’re ready to mix them into the filling.
Step 4: Make Filling Base
In a large pot, combine sugar and clear jel. Gradually stir in 2 cups of cold water along with 5¼ cups of peach juice or water from your blanched peaches. Cook over medium-high heat while stirring constantly until the mixture thickens and begins to bubble.
Step 5: Add Lemon Juice and Spices
Once thickened, stir in the bottled lemon juice along with ground cinnamon and nutmeg if desired. Allow it to boil for another minute to incorporate flavors.
Step 6: Add Peaches
Gently fold in your warm peach slices back into the thickened mixture. Bring it back to a boil while stirring gently.
Step 7: Fill Jars
Using a ladle, fill each warm jar with the hot peach filling while leaving about 1 inch of headspace at the top. Remove any air bubbles by running a spatula around the inside edges of each jar. Wipe down rims before sealing with lids and bands.
Step 8: Process Jars
Carefully place filled jars into a boiling water bath canner. Process for about 30 minutes (adjust time based on altitude).
Step 9: Cool and Store
After processing time is complete, let jars sit undisturbed for 12–24 hours. Once cooled completely, check seals on each jar before labeling them. Store in a cool dark place where they will keep well for up to one year.
How to Serve Homemade Canned Peach Pie Filling
Homemade canned peach pie filling is incredibly versatile and can be enjoyed in various delightful ways. Whether you’re baking a classic pie or creating a creative dessert, there are plenty of options to savor this sweet treat.
Classic Peach Pie
- A traditional use for your filling, simply pour it into a prepared pie crust, cover with another crust, and bake until golden brown.
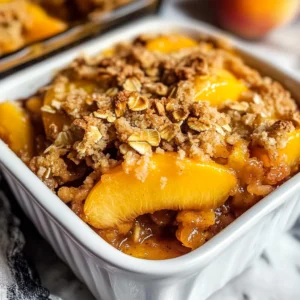
Peach Crisp
- Layer the filling in a baking dish and top with a mixture of oats, flour, butter, and spices. Bake until bubbly and the topping is crispy.
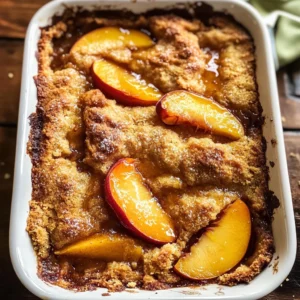
Peach Cobbler
- Pour the filling into a baking dish and drop spoonfuls of biscuit dough on top before baking. The result is a comforting dessert that’s perfect for any occasion.
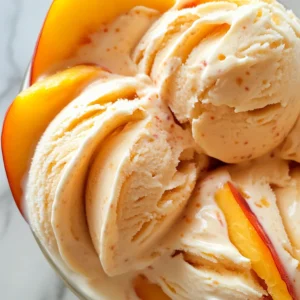
Peach Sundae
- Use the filling as a topping for vanilla ice cream. Add whipped cream and a sprinkle of cinnamon for an extra touch of sweetness.
Pancake Topping
- Warm the filling and serve it over pancakes or waffles for a delicious breakfast twist. It adds a fruity flavor that pairs perfectly with maple syrup.
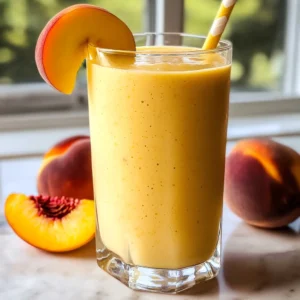
Yogurt Parfait
- Layer the peach pie filling with yogurt and granola in a cup for a refreshing snack or breakfast option that’s both nutritious and satisfying.
How to Perfect Homemade Canned Peach Pie Filling
Achieving the perfect homemade canned peach pie filling requires attention to detail. Here are some tips to ensure your filling turns out just right:
- Choose ripe peaches: Select peaches that are firm yet slightly soft to the touch. Ripe peaches enhance the flavor of your filling.
- Use clear jel: This cook-type thickener provides great texture and stability when canning, ensuring your filling holds up well.
- Maintain acidity: Always add bottled lemon juice to your mixture for acidity balance, essential for safe canning.
- Avoid browning: Soak sliced peaches in water mixed with lemon juice to prevent them from browning before canning.
- Proper headspace: Leave 1 inch of headspace in jars when filling them to allow for expansion during processing.
- Cool jars properly: After processing, let jars cool undisturbed to ensure proper sealing and longevity of your preserves.
Best Side Dishes for Homemade Canned Peach Pie Filling
Pairing side dishes with your homemade canned peach pie filling can elevate your meal experience. Here are some delightful options to consider:
Vanilla Ice Cream
A scoop of creamy vanilla ice cream complements the sweet flavors of the peach filling beautifully.Shortbread Cookies
Buttery shortbread cookies provide a crunchy contrast to the soft texture of the peach filling.Grilled Chicken Salad
A fresh salad topped with grilled chicken and drizzled with peach vinaigrette creates a savory-sweet balance.Cornbread Muffins
Moist cornbread muffins pair perfectly with peach desserts, adding a hearty element to your meal.Cheese Platter
A selection of cheeses like brie or goat cheese enhances the flavors of peach fillings, making for an elegant appetizer.Roasted Vegetables
Seasoned roasted vegetables bring earthiness that contrasts nicely with sweet peach dishes, providing a balanced plate.
Common Mistakes to Avoid
When making homemade canned peach pie filling, it’s essential to avoid common pitfalls that could affect the quality and safety of your preserves.
Using instant Clear Jel: Instant Clear Jel is not safe for canning because it doesn’t thicken properly during the heat process. Always choose cook-type Clear Jel for a safe and successful filling.
Neglecting jar sterilization: Failing to sterilize jars can lead to contamination and spoilage. Always wash your jars in hot soapy water and keep them warm until you’re ready to fill them.
Skipping the lemon juice: Omitting bottled lemon juice can compromise acidity, which is critical for safe canning. Use the recommended amount of bottled lemon juice to ensure safety and flavor.
Not measuring headspace correctly: Insufficient or excessive headspace can lead to jar breakage or spoilage. Always leave 1 inch of headspace when filling jars to allow expansion during processing.
Ignoring altitude adjustments: Failure to adjust processing time for higher altitudes can result in under-processed jars. Check local guidelines for altitude adjustments specific to your area.
Improper cooling methods: Removing jars from the canner and placing them directly on a cold surface can cause breakage. Allow jars to cool undisturbed in a draft-free area for 12–24 hours after processing.
Storage & Reheating Instructions
Refrigerator Storage
- Store sealed jars in the refrigerator once opened.
- Use within 1 week for best quality and flavor.
Freezing Homemade Canned Peach Pie Filling
- For long-term storage, transfer filling into airtight containers or freezer bags.
- Freeze for up to 1 year; label with date for easy tracking.
Reheating Homemade Canned Peach Pie Filling
- Oven: Preheat oven to 350°F (175°C). Place filling in an oven-safe dish, cover with foil, and heat until warmed through.
- Microwave: Transfer filling to a microwave-safe bowl. Heat on medium power in 1-minute intervals, stirring between each until hot.
- Stovetop: Pour the filling into a saucepan over medium heat. Stir often until heated thoroughly.
Frequently Asked Questions
Here are some common questions about making homemade canned peach pie filling.
How long does Homemade Canned Peach Pie Filling last?
Homemade canned peach pie filling lasts up to 1 year when stored in a cool, dark place. Once opened, refrigerate and use within a week.
Can I use frozen peaches for this recipe?
Yes, you can use frozen peaches! Just thaw them completely before preparing your filling.
What if my filling is too thick?
If your peach pie filling is too thick after cooking, you can add a little water or peach juice while stirring until you reach the desired consistency.
How do I adjust for high altitudes when canning?
Adjusting processing times is crucial at high altitudes. Refer to local guidelines or resources specific to your region for accurate adjustments.
Can I customize my peach pie filling?
Absolutely! You can add spices like ginger or vanilla extract for different flavors. Experiment with different fruit juices as well!
Final Thoughts
This homemade canned peach pie filling is not only delicious but also versatile! Perfect for pies, cobblers, or even breakfast toppings, it captures the essence of summer peaches all year round. Feel free to customize it with your favorite spices or fruit blends!
Did You Enjoy Making This Recipe? Please rate this recipe with ⭐⭐⭐⭐⭐ or leave a comment.
📖 Recipe Card
Print
Homemade Canned Peach Pie Filling
- Total Time: 1 hour 10 minutes
- Yield: About 10 servings 1x
Description
Homemade Canned Peach Pie Filling captures the essence of summer peaches, allowing you to enjoy their sweet, juicy flavor year-round. This delightful preserve is perfect for pies, crisps, and cobblers, making it a versatile addition to your dessert repertoire. With a silky texture and customizable spice options, this easy-to-make filling will elevate your treats while keeping your family and friends coming back for more. Experience the joy of preserving the taste of summer with this simple recipe that yields delicious results every time!
Ingredients
- 6 quarts fresh peaches, peeled, pitted, sliced
- 7 cups granulated sugar
- 2 cups cold water
- 1¾ cups clear jel (cook-type)
- 5¼ cups peach juice or water
- ½ cup bottled lemon juice
- 1½ teaspoons ground cinnamon (optional)
- ½ teaspoon ground nutmeg (optional)
Instructions
- Sterilize and warm 4–5 quart-size canning jars.
- Blanch peach slices in boiling water for 30–60 seconds; transfer to an ice bath.
- In a large pot, mix sugar and clear jel; gradually stir in cold water and peach juice. Cook over medium-high heat until thickened.
- Stir in lemon juice and spices; boil for another minute.
- Fold in warm peach slices; bring to a gentle boil.
- Fill jars with hot filling, leaving 1-inch headspace; seal tightly.
- Process jars in a boiling water bath for about 30 minutes.
- Allow jars to cool undisturbed for 12–24 hours before storing.
- Prep Time: 30 minutes
- Cook Time: 40 minutes
- Category: Dessert
- Method: Canning
- Cuisine: American
Nutrition
- Serving Size: 1/2 cup (120g)
- Calories: 210
- Sugar: 52g
- Sodium: 5mg
- Fat: 0g
- Saturated Fat: 0g
- Unsaturated Fat: 0g
- Trans Fat: 0g
- Carbohydrates: 55g
- Fiber: 2g
- Protein: <1g
- Cholesterol: 0mg